Microsoft Support and Recovery Assistant for Office or Microsoft 365 is an application introduced by Microsoft that helps users fix problems within Office 365 applications like Outlook, Power BI, and Office (Word, Excel, PowerPoint, etc.) through a few simple steps.
Are you managing multiple Office 365 tenants? If yes, read our guide, 15 Tricks to Succeed in Managing Multiple Office 365 Tenants to help you save time. Click here to learn how.
How Does It Work?
The tool uses a predefined repair and recovery algorithm to solve problems in Office 365. Support and Recovery Assistant helps reduce engineer tickets for Office or Microsoft 365. With the Support and Recovery Assistant, most problems are automatically resolved, but if the assistant is unable to find a solution, it lists a series of additional steps you can take. As problems arise, the tool is frequently updated with new patches.
8 Steps to use Microsoft Support and Recovery Assistant for Office apps
1) Download the Support and Recovery Assistant
Download the tool here. Note that you must install the Recovery Assistant on the affected machine in order for it to properly diagnose and troubleshoot the issues you’re experiencing.
2) Launch the Assistant
Once the assistant is installed on your machine, launch it.
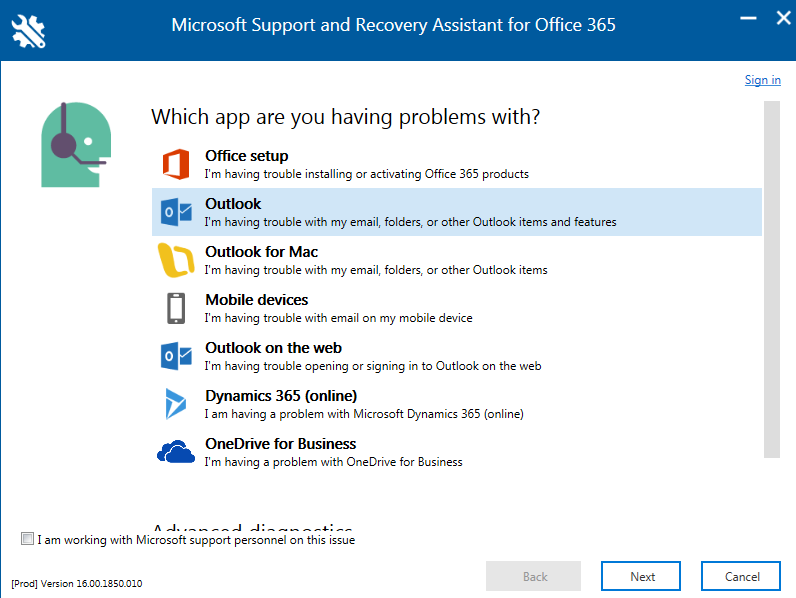
3) Select the Application that Needs Troubleshooting
Select the application that you are having issues with from the list, and click Next. We’ll select Outlook as an example.
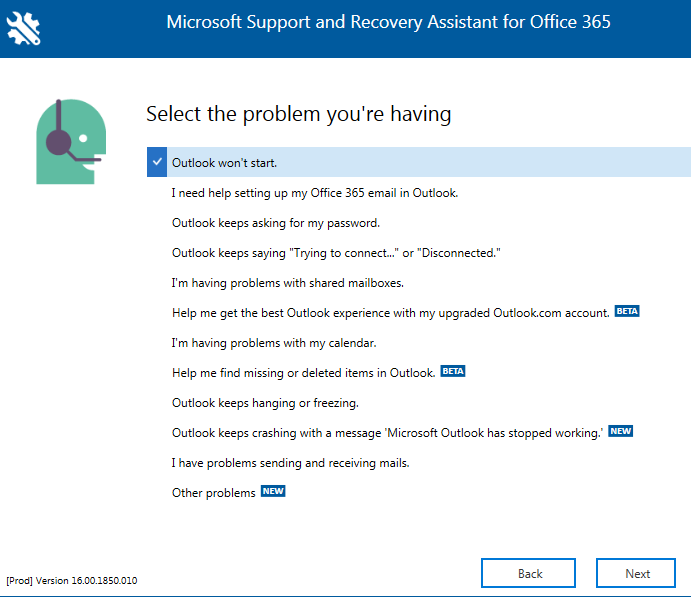
4) Select the Problem You’re Having
Select all problem descriptions that match the issue you are experiencing, and click Next.
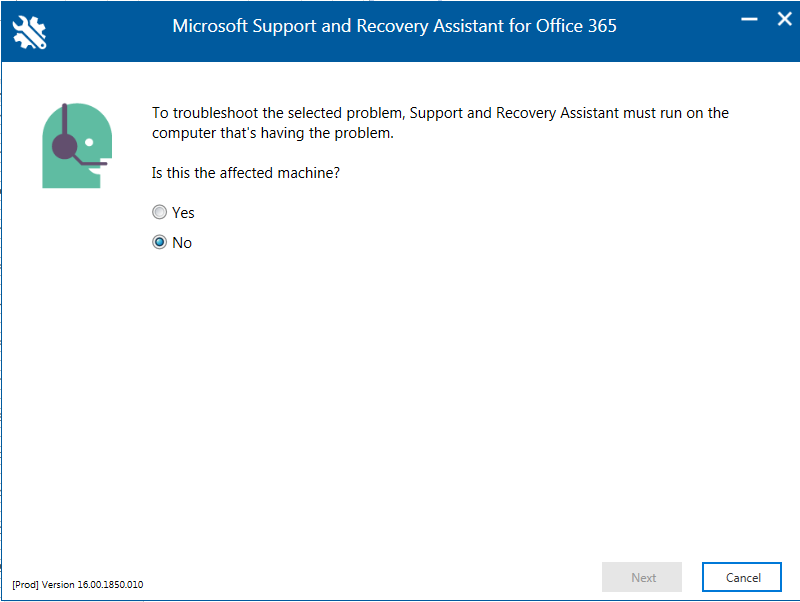
5) Work on the Affected Machine
Select “Yes” when asked if this is the affected machine. Click Next to proceed.
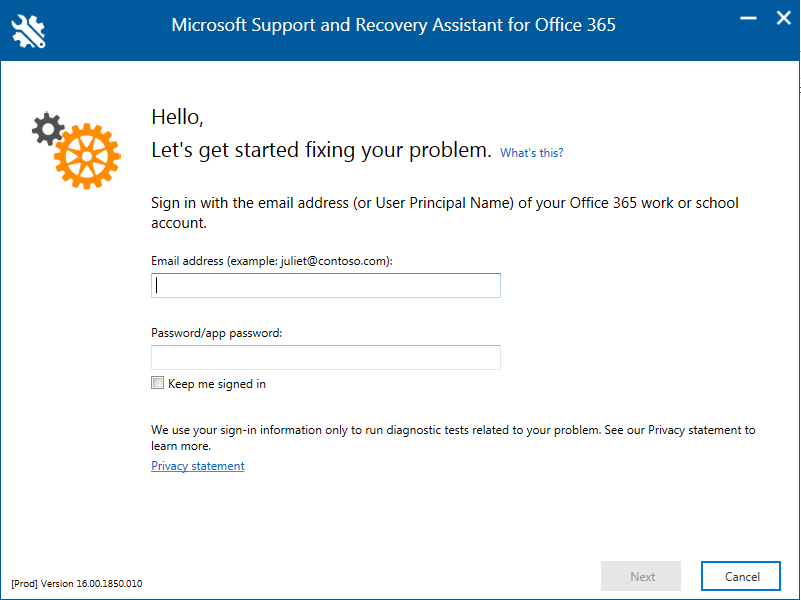
6) Log In to Your Office 365 Account
You should now see a login page for Office or Microsoft 365. Sign in with your email and password. Click Next to begin the diagnosis.
7) Let the Assistant Fix the Issue
Once Microsoft has checked all possible solutions to your problem, it will display a diagnosis report and a summary of actions the tool performed on your device.
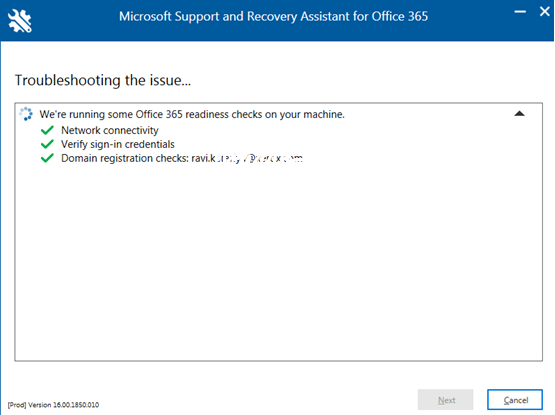
8) Advanced Diagnostics
If your problem was not fixed automatically, you can choose to obtain advanced diagnostics from Support and Recovery Assistant to generate a detailed report. Note that this option is currently only available for Outlook and Exchange.
Step 1: Launch the assistant and select the “Advanced diagnostics” option. If you’re working with a Microsoft support agent, you can also check the option at the bottom that reads “I am working with Microsoft support personnel on this issue”.
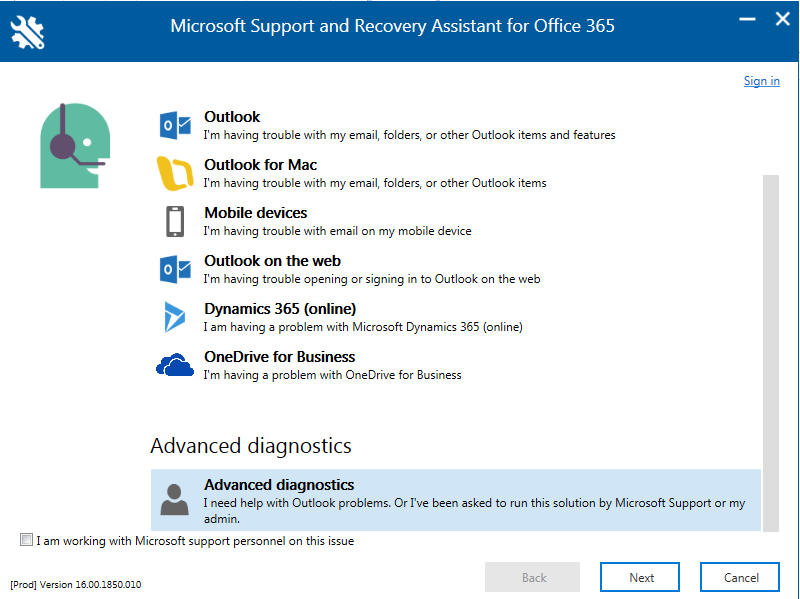
Step 2: Select your Outlook type from the options. We’ve selected Exchange Online to illustrate.
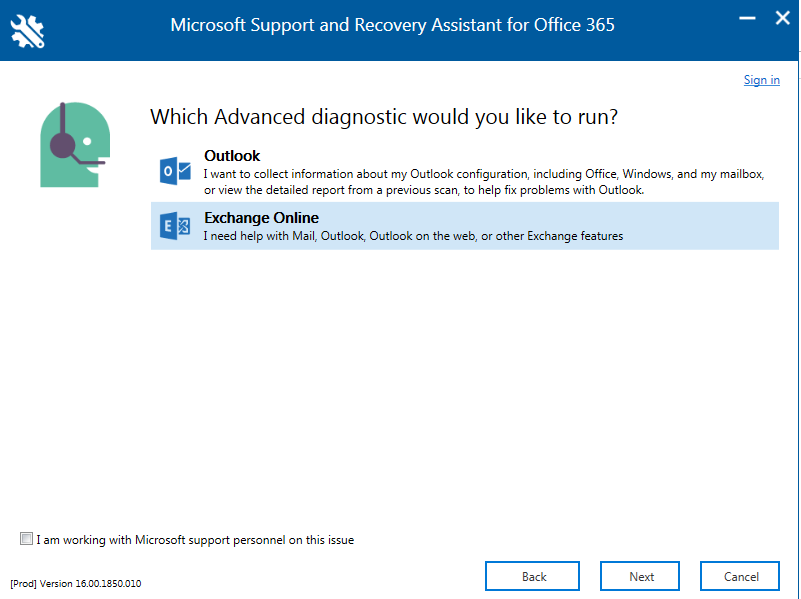
Step 3: Select the first option to check your Exchange Online connection. If the tool doesn’t find anything, you’ll need to check the second option to perform an authentication check on your email ID.
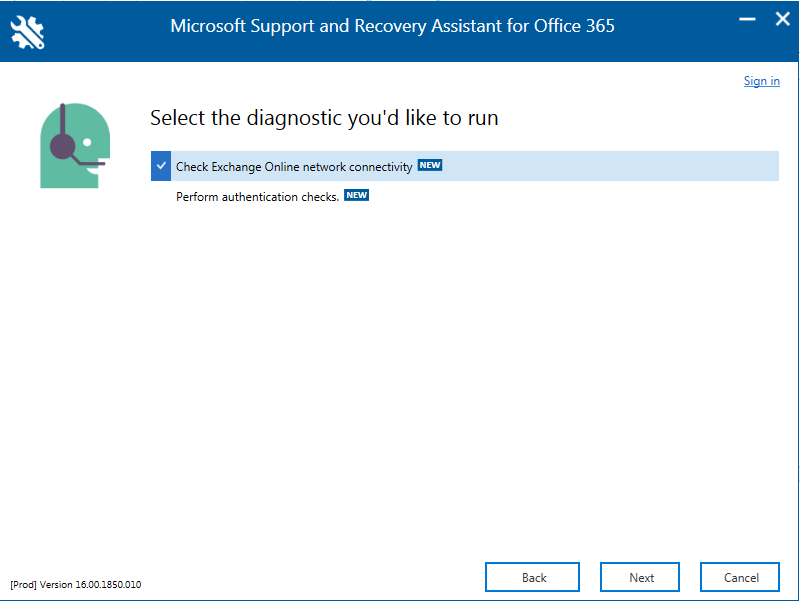
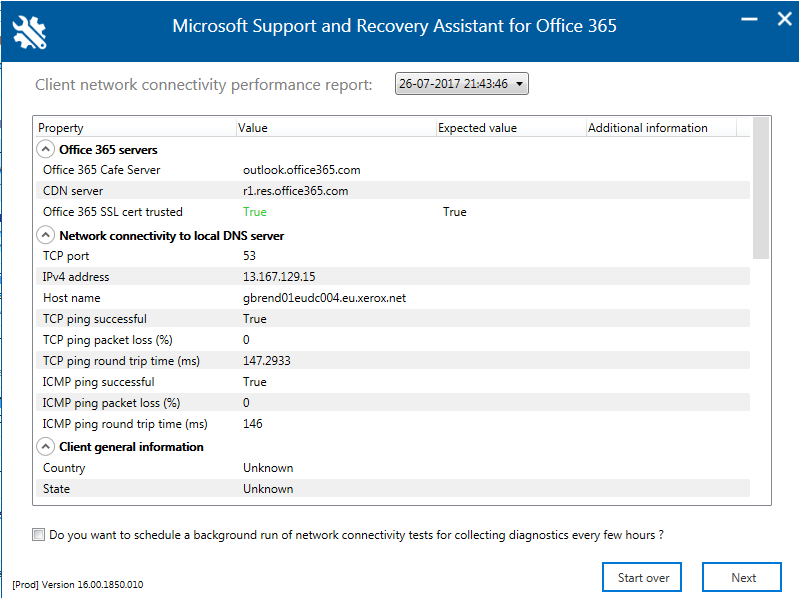
Step 4: once the Support and Recovery Assistant finishes its validation, it will show a detailed diagnosis report like the one below, which you can share with a Microsoft support technician for a better understanding of the problem.
Still Having Problems?
If Support and Recovery Assistant was unable to identify or fix the issue with your system, please get in touch with a support service.


