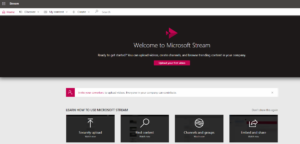
How do you manage online meetings, employee training, and other video content without constantly switching back and forth between different platforms? Microsoft Stream was designed to address this problem by providing a single repository where your company’s video content can be stored and shared with employees. It’s available as part of Office 365 or as a standalone enterprise app.
In this article, we’ll take a look at how you can create channels and groups in Microsoft Stream, as well as upload and organize your videos. Let’s get started!
Learn how to sell Office365 the right way with our FREE Sales Guide
Microsoft Stream Groups
Groups allow you to organize your users (and videos—but more on that later). By adding individuals to a group, you give them access to the videos and channels within that group.
A group has owners and members. Owners of a group have full control of the group, including its channels, members, and videos. They have the ability to edit the group settings, create or delete channels, or even delete the group itself. Members can either contribute videos to the group or just view existing videos.
When you create a group in Microsoft Stream, you really end up creating a new Office 365 group. Groups can either be public within your organization or private. Anyone from your organization can join a public group. But to join a private group, a user must first request and get permission. Only group members may view a video in that specific group.
Note that there are different types of default permissions for access depending on how you upload your videos, but you can always change them later to suit your needs.
Creating a Group
- Open the Microsoft Stream app.
- By default, you should land on the Home
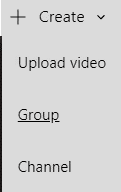
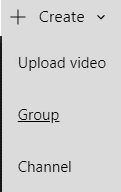
- Click the Create button, and select the Group option to create a new group. You can also select an existing group.

- Enter the information about your group’s name, description, type, and initial members (you can add more users later).
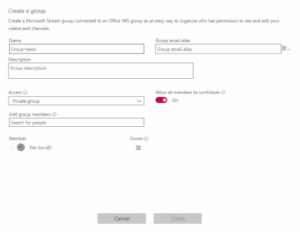
- When you’re done, click the Create
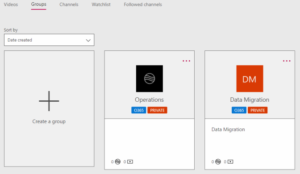
- Select the Groups tab to view your newly created group.
Channels
Like channels on YouTube, channels in Microsoft Stream are simply a collection of videos. Channels can either be companywide or part of a specific group.
Everyone in your company can view, create, and delete videos belonging to a companywide channel, as long as those videos have been marked as Allow everyone in your company to view the video. However, only the channel owner can modify the channel’s settings. This is a great option if you’d like to curate content from a wide number of users.
Group channels inherit the permissions of the groups to which they belong. All members of the group can create a channel, add or remove videos to or from a channel, and edit the channel’s settings.
[BLOG] 5 Signs That Your Client Needs Office 365
Creating a Channel
- Open the Microsoft Stream app.
- Go to the Home
- Click the Create button, and select the Channel option to create a new channel.

- Enter your channel’s information, including its name, description, and type (company wide or group).
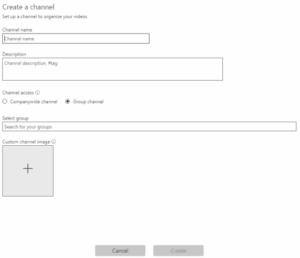
- When you’re finished, click the Create
- Select the Channels tab to view the new channel.
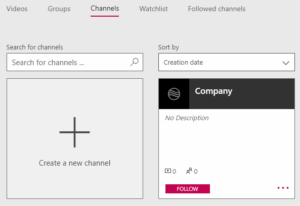
Uploading a Video
- Open the Microsoft Stream app.
- At the top of any page, there is an Upload You can click on it and browse to the video you wish to upload. You can also take advantage of the drag-and-drop feature to upload one or more videos to a group or channel.
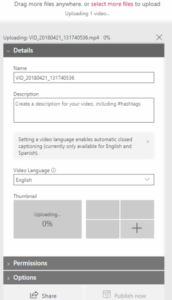
- Enter the information about the video, such as details, permissions, and options.
- Click the Share button or the Publish
- Go back to the main page in Microsoft Stream.
- Click the My content
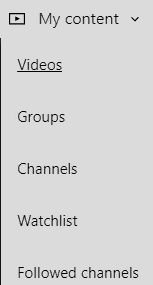
- Select the Videos option to view your uploaded videos.

Discover and Search
You can use Stream to search for videos, channels, people, and groups.
- Open the Microsoft Stream app.
- Go to the Home
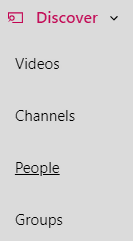
- Click the Discover dropdown, and select the type of content you want to find:
You can browse for videos, channels, people in your organization, and groups.
In addition to browsing from the Discover tab, you can also use the search bar to the right of the navigation.

However, it should be noted that the Discover tab gives you more options for how to search for content.
Videos
If you select Videos, you have the following search options:
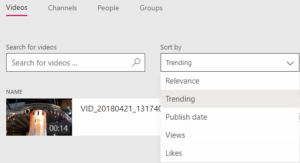
- Simple search – enter text on which to search
- Relevance – results sorted on an item’s relevance to the search criteria
- Trending – results sorted on how popular an item has been in searches
- Publish Date – results sorted on the published date of the item
- Views – results sorted on the number of views
- Likes – results sorted on the number of likes
Channels
If you select Channels, you have the following search options:
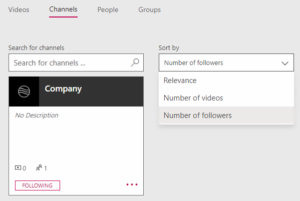
- Simple search – enter text on which to search
- Relevance – results sorted on an item’s relevance to the search criteria
- Number of videos – results sorted on the number of videos in the channel
- Number of followers – results sorted on the number of followers of the channel
People
If you select People, you have the following search options:
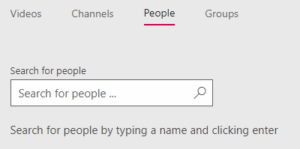
- Simple search – enter text on which to search
Groups
If you select Groups, you have the following search options:
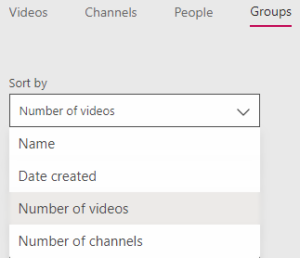
- Name – results depend on the group name entered
- Date created – results sorted by the creation date of the group
- Number of videos – results sorted on the number of videos in the group
- Number of channels – results sorted on the number of channels in the group
Microsoft Stream makes it easier than ever to create company videos and share them with your employees, without having to manage different third-party apps.
Sound like what you’ve been looking for? Get started with Office 365 today to enjoy all the benefits of Microsoft Stream and other great apps.


