OneDrive for Business is a big part of every Office 365 plan. As an IT administrator, you need to find ways to more efficiently set up such solutions.
We already discussed how to set up OneDrive for Business for all your tenants. Now, let’s look at how you can deploy the OneDrive Sync client in your work environments. We will focus on deployment methods and security controls.
Sync client requirements and configuration
Before we start deploying the client, we need to understand its software requirements. The OneDrive sync client is supported on Windows 10, Windows 8.1, Windows 8, and Windows 7. It’s also available for Mac OS; however, the deployment process is slightly different, and we will cover this in one of our future articles. Microsoft recommends using Office 2013 or 2016 for better experience and compatibility.
14 configurations in OneDrive for Business
1) Deploy security and configuration settings
To set registry keys on computers in your domain, you can use the OneDrive.admx and OneDrive.adml Group Policy files in the OneDrive Deployment Package provided by Microsoft. This helps you configure all the Group Policy based settings, which we’ll discuss next.
2) Use System Center Configuration Manager (SCCM) to deploy OneDrive Sync Client
To deploy through SCCM, you can save the OneDrive setup installer for Windows to the network share. The installer is available here.
To install the OneDrive sync client on Windows, run the following command using the System Center Configuration Manager:
Execute <pathToExecutable>\OneDriveSetup.exe /silent
The installer will place the OneDrive executable file under %localappdata%\Microsoft\OneDrive.
As OneDrive does not support single sign-ins using Windows credentials, you can help users sign in to the Sync client via SCCM.
Run the following command using the System Center Configuration Manager (SCCM) script to start the OneDrive process: %localappdata%\Microsoft\OneDrive\OneDrive.exe
If your users haven’t set up any accounts, executing the above command will display OneDrive Setup. To display OneDrive Setup specifically for users who haven’t set up any accounts for your tenant, use the following command-line parameter: /configure_business:<tenantId>
3) Access OneDrive admin center
Some of the security controls can be managed via the OneDrive admin center. To do so, you should have global administrator rights. Here’s how to access the OneDrive admin center:
- Log in to https://portal.office.com/adminportal/home
- Choose Admin centers from the left-hand navigation and click on Select OneDrive.
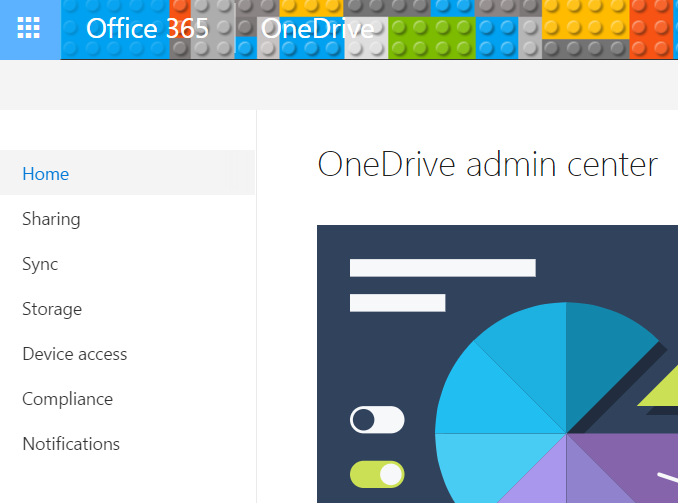
- In the OneDrive admin center, you should see the following options:
4) Set default storage space
By default, OneDrive sites have 1 TB of storage for every user. Organizations with E3, E4, E5,SharePoint Online Plan 2, or OneDrive for Business Plan 2 can increase their storage limits up to 5 TB. Follow these steps to manage this setting:
- Click on Storage
- Enter the default storage amount
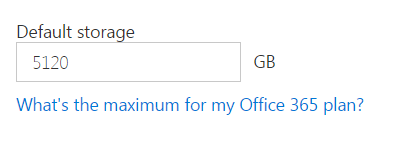
- Click Save when you’re done.
5) Set default location for folder and prevent users from changing it
You can choose a location for OneDrive for Business files. However, you should have one common location for Sync folders to help you troubleshoot and locate missing files.
Set default location
You can set a specific path as the default location for a folder. By default, the path is under %userprofile%.
To enable this, set the following registry key value to 1:
Path: [HKCU\SOFTWARE\Microsoft\OneDrive\Tenants\tenant ID]
Value: “DefaultRootDir”=”D:\\CompanyData”
Once this is done, the local folder will default to the path that you specify in the OneDrive ADMX file.
Note: if you work with shared computers, you should keep the default location under %userprofile%.
Prevent users from changing the default location
This lets you prevent users from changing the locations of their folders. Enabling this policy requires setting the following registry key value to 1:
Path: [HKCU\SOFTWARE\Microsoft\OneDrive\Tenants\1111-2222-3333-4444-5555-6666]
Value: “DisableCustomRoot”=dword:00000001
To use this policy, you must update the OneDrive.admx file in your Group Policy central store and add your tenant ID.
6) Allow syncing only on domain-joined machines
To make sure that users sync files only on managed computers, you can configure OneDrive to sync only on PCs that are part of specific domains. Follow these steps to configure this option:
- Click on Sync.
- Under Sync Settings, check the “Allow Syncing only on PCs joined to specific domains” option.

- Click on Edit Domains and add the Company Domain GUID in the box. Save your changes when you’re done.
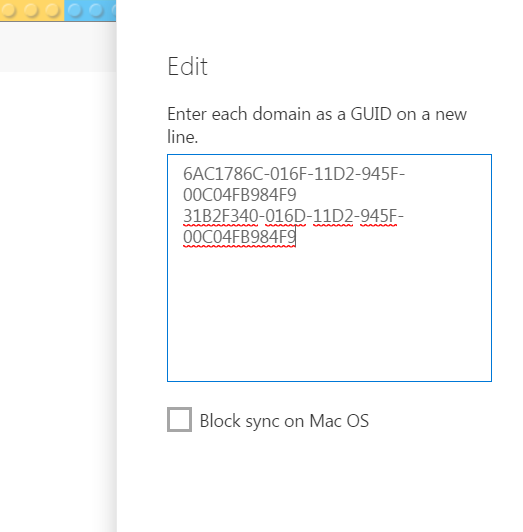
This policy allows users to only use the company machine when syncing files.
7) Prevent users from synchronizing OneDrive personal account
Microsoft can synchronize personal OneDrive accounts. However, your business might ask that your remove access to personal cloud storage. This is why Microsoft included this setting.
By default, users are allowed to sync personal OneDrive accounts.
To disable synchronizing, set the the following registry key value to 1:
Path: [HKCU\SOFTWARE\Microsoft\OneDrive]
Value: “DisablePersonalSync”=dword:00000001
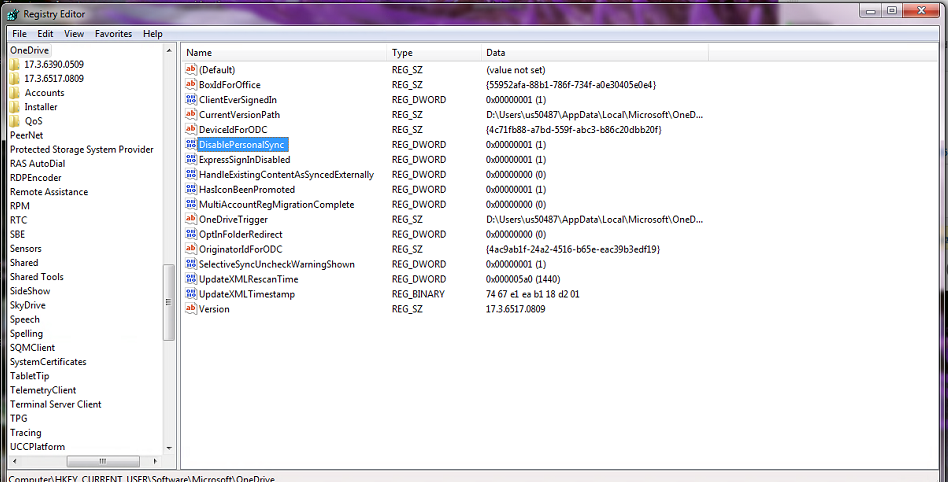
Once this is enabled, your users will see an error if they try to synchronize their personal OneDrive accounts. Their files will remain on the computer but will be unsynchronized.
8) Block syncing of specific file types
Administrators can prevent users from syncing specific file types when they sync their OneDrive for Business files. Use these steps to manage this setting:
- Click on Sync
- Under Sync Settings, check the “Block Syncing of specific file types” option.
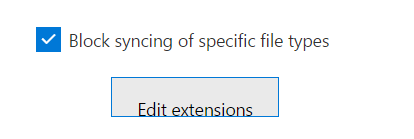
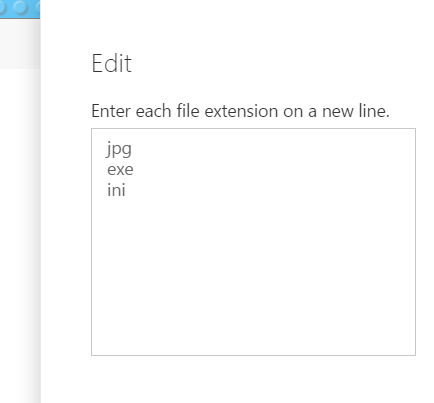
- Click on “Edit extensions” andadd yourextensions on separate lines. Click Save when you’re done.
9) Set the maximum percentage of upload bandwidth
This policy is helpful if you have poor bandwidth, as it lets you configure the maximum percentage of bandwidth that a computer can use to upload files.
Because the bandwidth available to a computer is constantly changing, a specified percentage allows Sync to respond to fluctuations in bandwidth availability while synchronizing in the background. The lower the percentage, the slower it will synchronize files.
It is recommended that you keep a value of 50% or higher. By default, OneDrive uses 99% bandwidth.
This policy allows synchronization at full speed for one minute, after which it will slow down to the specified upload speed. This means that a very small file will be uploaded quickly because it fits within the one-minute synchronization, whereas large files will be uploaded while keeping your bandwidth usable.
To enable this policy, sets the following registry key value to a number from 10 to 99. Use hexadecimal values. For instance, to set your bandwidth percentage to 50%, use the hexadecimal value for 50 (which is 00000032).
Path: [HKLM\SOFTWARE·\Microsoft\OneDrive]
Value: “AutomaticUploadBandwidthPercentage=dword:00000032
10) Control access based on network location
This policy helps administrators to prevent users from accessing OneDrive and SharePoint content on devices outside of specific domains and networks.
- Click on Device Access
- In order to control access based on a network location, select the “Allow access only from specific IP address locations” checkbox and then click Add locations directly below.
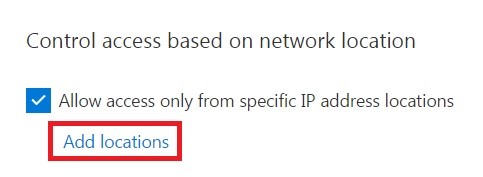
- Scroll through, and click Save when you’re done.
11) File collaboration policy
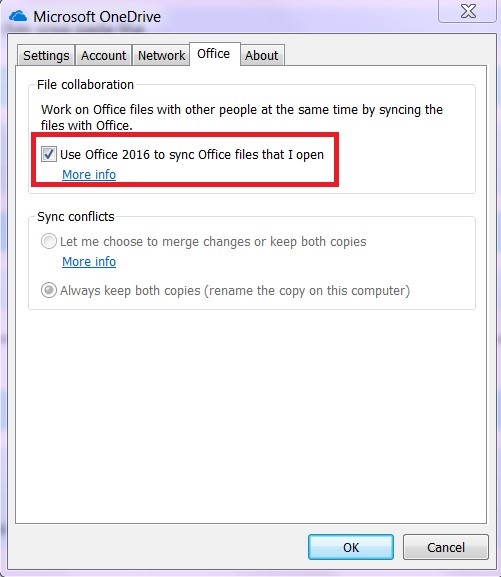
The coauthoring feature was initially unavailable, but it’s now available as a policy that you can configure. It’s recommended that you enable this feature.
To do so, set the following registry key value to 1:
Path: [HKCU\SOFTWARE\Microsoft\OneDrive]
Value: “EnableAllOcsiClients”=dword:00000001
12) Sync conflict policy
This policy defines what happens when there’s a conflict between file versions during synchronization.
By default, users decide if they want to merge, change, or keep both copies. They can also configure the Sync client to always keep both copies.
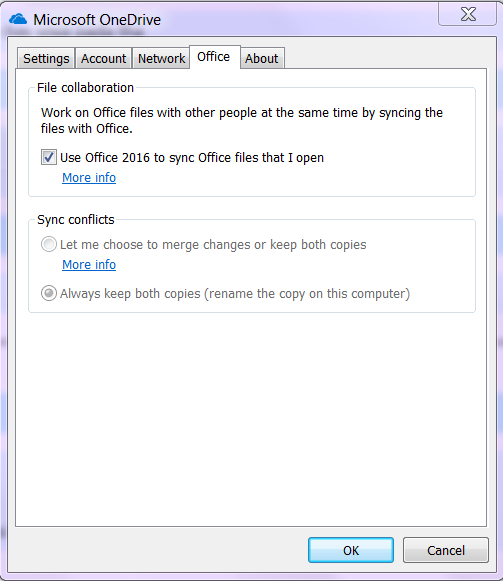
Set the following registry key value to 1 to enable this policy:
Path: [HKCU\SOFTWARE\Microsoft\OneDrive]
Value: “EnableHoldTheFile”=dword:00000001
You need to enable the file collaboration policy (step 4) in order to access this option.
13) External sharing
External sharing has recently become a key attraction in Office 365 Storage services. The following 4 configuration options are currently available for external files:
- Completely disable external sharing
- Only existing external users can access the services
- Files and sites can be shared with new and existing users
- Anyone, including anonymous users, can access the files without logging in
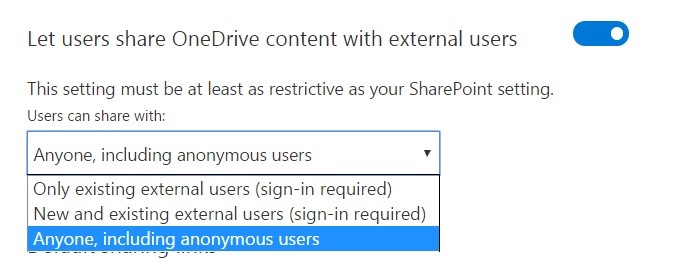
We recommend using the third option to allow internal users to invite new external users. The fourth option will increase the chances of confidential data loss because file links can be accessed by unauthorized users.
14) Preserve OneDrive files after users leave the organization
This setting preserves content for a longer duration, even if the user has left the organization. By default, Microsoft keeps OneDrive data for 30 days after the deletion of an Office 365 account. Now, administrators can decide for how long they’d like to keep files. The maximum value is 3650 days (ten years). Follow these steps to manage this setting:
- Click on Storage
- Enter the number of days in the “Days to retain files in OneDrive after a user account is marked for deletion” box.

- Click on Save to update your changes.


